 St. Petersburg Window
 Why St. Pete Beach Siding Wears Differently Than Inland Homes
A house a few blocks from the Gulf takes a different kind of beating than a house ten miles inland in St. Petersburg. Salt-laden air rides in on the sea breeze almost every day, settling into seams, fastener heads, and any gap in the paint film. Add Pinellas County's intense year-round UV load, wind-driven rain that gets pushed sideways into every lap joint, and the occasional hurricane-force wind event, and you have a siding assembly that's under constant stress from four directions at once.
None of that means siding on a barrier island community like St. Pete Beach is doomed — it means the margin for a sloppy install or a deferred repair is thinner than it is elsewhere. A small gap or a cracked panel that would sit harmlessly for years in a drier, calmer climate becomes a moisture entry point much faster here. That's the context every repair decision on this stretch of coast needs to be made in.
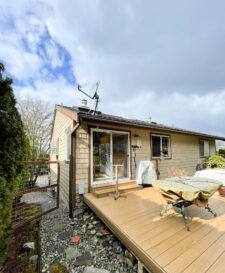
Signs Your Siding Needs Attention
Most siding failures on St. Pete Beach homes don't show up as one dramatic event — they show up as small, easy-to-ignore details that add up. Here's what we tell homeowners to watch for between inspections:
- Cracked, chipped, or spongy panels, especially near the ground line or around window and door trim
- Fastener heads that have popped, rusted, or bled a rust stain down the face of the siding
- Bubbling, peeling, or chalky paint — often the first visible sign that moisture or UV has broken down the finish
- Gaps opening up at butt joints, corners, or where siding meets trim, flashing, or roofline
- Soft or discolored spots when you press on the siding by hand, which usually means moisture has already gotten behind it
- Visible warping or waviness along a wall that catches direct afternoon sun
- Efflorescence (a chalky white residue) near the base of walls, which points to trapped moisture working its way out
Any one of these on its own might be a small repair. Several of them together, or any sign of soft/spongy material, usually means water has been getting behind the siding for a while and the repair needs to include a look at what's underneath.
What a Correct Siding Repair Actually Involves
It's Not Just Swapping a Board
A repair that only replaces the visible damaged piece and ignores what caused the damage is a repair that fails again. On a coastal property, the far more common failure mode isn't the siding material itself — it's what's happening behind it: a compromised weather barrier, a flashing detail that was never sealed correctly, or fasteners that were driven wrong and let water track inward.
Steps a Proper Repair Follows
- Remove the damaged section carefully, without disturbing more of the surrounding assembly than necessary
- Inspect the water-resistive barrier, sheathing, and framing behind the removed section for rot, mold, or moisture staining
- Address the underlying cause — a flashing gap, a caulk failure, a fastener pattern that was too aggressive or too sparse — before anything new goes back on
- Replace with matching material, fastened to manufacturer and code specifications for wind resistance
- Reseal and re-flash any penetrations, corners, or trim intersections disturbed during the repair
- Match the finish so the repair doesn't stand out as an obvious patch
Skip step 2 or 3 and you've covered up a problem instead of fixing it — which on a home this close to the water tends to resurface within a season or two, usually worse than before.
Repair or Replace? How We Help You Decide
Not every damaged section needs a full re-side, and not every home is a good candidate for spot repair. The honest answer depends on how much of the wall is affected, how old the existing siding is, and what we find once we open up the damaged area.
| Factor | Leans Toward Repair | Leans Toward Full Replacement |
|---|---|---|
| Extent of damage | Isolated to one or two panels/sections | Spread across multiple walls or elevations |
| Underlying sheathing/framing | Dry, sound, no rot found | Soft, rotted, or moisture-stained over a wide area |
| Age of existing siding | Still well within its service life | Near or past the end of its expected life |
| Material match | Discontinued product with a close match available | No reasonable match; patch would look visibly different |
| Cause of damage | Isolated impact or one-off installation error | Systemic issue (bad WRB, chronic moisture, storm-wide damage) |
We'll tell you plainly which category your home falls into. If a targeted repair genuinely solves the problem, that's what we recommend — there's no reason to sell a full re-side to a homeowner who doesn't need one.
Matching Material and Finish on a Repair
One of the harder parts of a good siding repair is making the patched section disappear into the rest of the wall. This matters more on a beach community home where sun-fading is uneven — a wall that gets full afternoon Gulf-side sun will have faded differently than a shaded north wall, even on the same house.
We install James Hardie fiber cement exclusively, and for repairs on Hardie siding we work from the same HZ10 product line and ColorPlus factory-finish palette used in the original install, so the patched section is matched in profile, texture, and color rather than repainted by hand and hoping it blends. Hardie's factory finish is baked on and warranted against fading in a way field-applied paint isn't, which is part of why a color match holds up over time instead of drifting apart from the surrounding panels within a year or two.
If your home currently has a different siding material — vinyl, wood, or another fiber cement brand — we'll still repair what's there when a repair is the right call. But when a section is damaged badly enough, or often enough, that replacement material is genuinely needed, we only install Hardie going forward. We won't source or install vinyl or LP SmartSide patches; it's simply not a product we install, for reasons that come down to moisture behavior and long-term maintenance burden rather than any one dramatic failure. For a homeowner facing repeated repairs on an aging vinyl or wood-sided wall, that's often the point where a conversation about a longer-term fix makes more sense than another patch.
Cost Factors Homeowners Should Understand
We don't publish flat prices because every repair depends on what's found once a section is opened up, but the factors below are what actually drive the cost:
| Cost Driver | Why It Matters |
|---|---|
| Size of the affected area | A single panel is a small job; multiple sections across a wall add labor and material |
| Condition behind the siding | Sound sheathing keeps the job simple; rot or mold means added remediation before new siding goes back on |
| Height and access | Second-story or hard-to-reach sections on beach homes with pool cages, decks, or tight lot lines take longer |
| Material availability | Matching an older or discontinued profile can take more time to source than a common current line |
| Flashing and trim work required | Repairs that also need new flashing or trim add scope beyond the siding itself |
Broadly, a small, isolated repair on sound sheathing is a modest expense; a repair that uncovers moisture damage or spans several sections moves toward the cost of a partial re-side. We'll give you an honest number after we've actually looked at the wall, not before.
Our Process for St. Pete Beach Repairs
Because we already work regularly in St. Petersburg and the surrounding Pinellas County coastal communities, we're familiar with the practical realities of beach-adjacent properties — narrow lots, elevated foundations, HOA or condo-association approval steps, and the salt exposure that inland crews don't deal with day to day.
- On-site inspection: we look at the full wall, not just the damaged spot, and check for related issues nearby
- Root-cause diagnosis: we identify why the damage happened, not just where
- Written scope and estimate: a clear explanation of what we found and what we recommend, repair or replacement
- Material sourcing: matched to your existing Hardie product line and color, or a plan for transitioning a damaged section to Hardie if that's the better long-term call
- Repair execution: proper fastening, flashing, and sealing to current wind-load expectations for coastal Pinellas County
- Cleanup and walk-through: we show you what was done and why before we consider the job finished
Why Local Experience on St. Pete Beach Matters
Siding repair isn't identical everywhere in the Tampa Bay area. A crew that mostly works inland subdivisions doesn't necessarily have a feel for how fast salt air corrodes fasteners near the Gulf, how wind-driven rain behaves against a Gulf-facing wall during a summer storm, or how to sequence a repair around a barrier island's tighter permitting and access realities. Crews that already work St. Pete Beach regularly build up a working knowledge of which failure patterns show up here specifically — where moisture tends to collect, which wall orientations fade and fail fastest, and what a repair needs to hold up through the next storm season, not just look fine on move-out day.
That local pattern recognition is also why we standardized on James Hardie fiber cement rather than offering every siding product on the market. Non-combustible fiber cement with a factory-applied finish and a product line engineered for high-moisture, high-UV climates gives us a consistent, well-understood system to repair and warranty — instead of juggling the maintenance quirks of several different materials across every job we take on near the coast.
Ready for an Honest Look at Your Siding?
If you're seeing cracked panels, popped fasteners, or paint that's giving up on a St. Pete Beach home, it's worth having someone look before a small issue turns into a wet-wall problem. We'll walk the exterior, tell you plainly whether you need a repair or something more, and put it in writing. Reach out below for a free, no-pressure estimate.